How to Create a DIY Roof Drainage System for Effective Rainwater Management
Managing rainwater effectively is crucial for maintaining the integrity of your home and landscaping. A well-designed roof drainage system prevents water accumulation, reduces runoff, and helps avoid costly repairs. In this guide, we will detail how to create a DIY roof drainage system that maximizes effective rainwater management.
Understanding Roof Drainage Systems
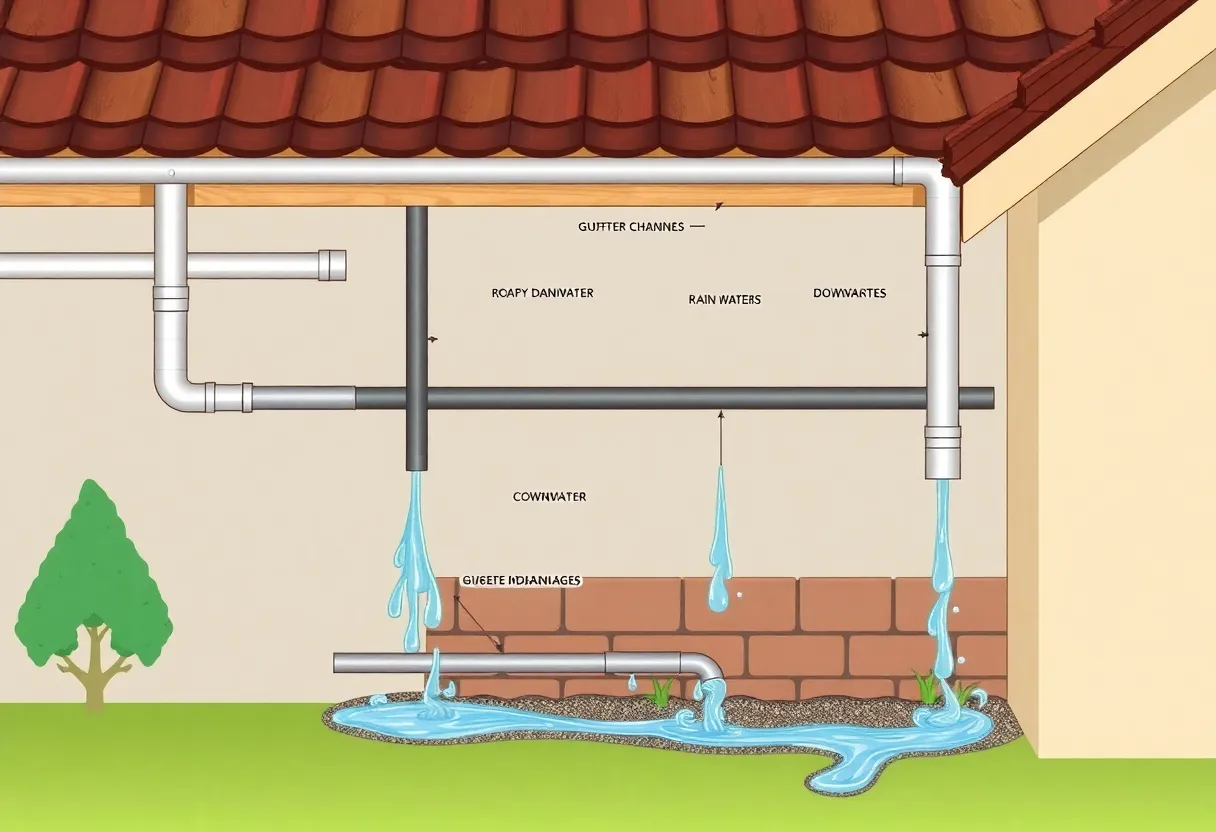
A roof drainage system is designed to manage excess rainwater and direct it away from the foundation of a structure. This system comprises various components, including gutters, downspouts, and drainage channels, which work together to collect and redirect water.
Importance of a Proper Drainage System
Flooding, foundation damage, and mold growth are common issues caused by poor drainage. When rainwater isn’t directed properly, it can pool around the base of a building, leading to significant structural damage over time. Thus, an effective roof drainage system is essential for:
- Protecting your home’s foundation
- Preventing erosion
- Avoiding water damage
- Reducing landscaping problems
- Conserving rainwater
Components of a DIY Roof Drainage System
A basic roof drainage system consists of several critical components:
Gutters
Gutters collect rainwater from the roof and direct it toward the downspouts. They are typically mounted along the eaves of a roof. Materials can vary, but aluminum, vinyl, and copper are popular options.
Downspouts
Downspouts channel water from the gutters down to the ground or a drainage system. They should be securely fastened and positioned to prevent clogging.
Drainage Channels
Drainage channels, also known as French drains, are channels dug into the ground that allow collected rainwater to flow away from the home. These can be made from gravel or perforated piping.
Step-by-Step Guide to Creating a DIY Roof Drainage System
Step 1: Assess Your Roof
Before beginning construction, assess your roof to determine the amount of rainfall it typically receives and evaluate its slope. This assessment will guide your decisions regarding gutter size and placement.
Step 2: Gather Necessary Materials
Compile all materials needed such as:
- Gutters and downspouts
- Mounting brackets
- Drainage pipes
- Gravel
- Pipe fittings
Step 3: Install Gutters
Begin by installing the gutters along the edge of the roof. Use a level to ensure they are slightly sloped toward the downspouts. Secure them with mounting brackets and ensure they are free of debris.
Step 4: Install Downspouts
Attach downspouts to the gutters at determined intervals. Ensure they angle away from the building and into a drainage area. Secure downspouts using brackets to prevent movement caused by wind or rain.
Step 5: Create Drainage Channels
If necessary, construct drainage channels to direct water away from your foundation. This involves digging a trench away from your home and lining it with gravel or perforated pipe to enhance drainage efficiency.
Step 6: Test Your System
After installation, observe how the system performs during rainfall. Check for any leaks or blockages and rectify any issues promptly to maintain optimal function.
Maintenance and Troubleshooting
A DIY roof drainage system requires regular maintenance to ensure continued efficiency. Key maintenance tasks include:
Regular Cleaning
Clear the gutters and downspouts of leaves, twigs, and debris at least twice a year, preferably in spring and autumn. This prevents blockages and water overflow.
Inspect Seals and Joints
Periodically check for leaks in the gutters and downspouts. Reapply silicon sealant or replace damaged sections to ensure a watertight seal.
Monitor Drainage Channels
Inspect drainage channels for clogs. If necessary, flush them with water to maintain proper flow.
Conclusion
Installing a DIY roof drainage system can significantly enhance your home’s rainwater management, protecting it against structural damage and promoting a healthier landscape. By adhering to proper installation techniques and performing maintenance checks, you ensure longevity and efficiency for your drainage system.
For those contemplating a DIY project, a well-constructed roof drainage system provides better rainwater management and contributes to environmental conservation. Observe local regulations regarding rainwater drainage and consider consulting with a professional if uncertain about any aspect of installation.